
Shark is a brand that is known for producing cordless vacuum cleaners that make cleaning more effective, easier, and quicker. If you are planning to invest in one of the best cordless vacuum cleaners from Shark, but don’t know where to start, congratulations because, you have just visited the right place. In this article, we will walk you through the best shark cordless vacuum reviews to help you decide which one suits you the most. So without further ado, let’s get started! Best Shark Cordless Vacuum Reviews1) Shark ION P50 Cordless Upright Vacuum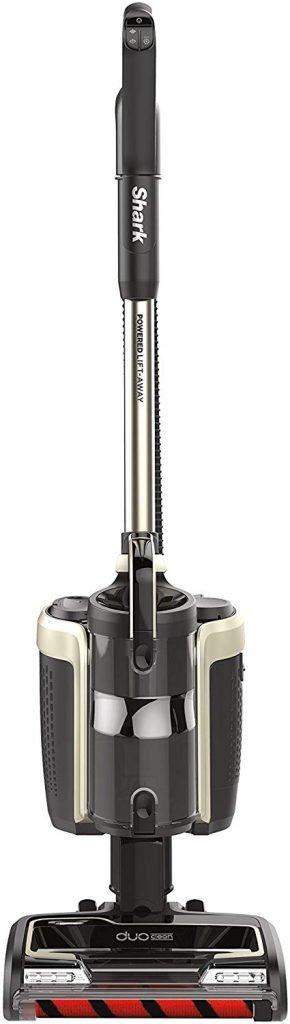
This cordless vacuum from Shark can handle debris and dust of all kinds. As a matter of fact, you can use it as a stick vacuum to clean stairs and under furniture or for fast pickups. What’s more, you can easily convert it to a handheld if you are going to clean your car, drapery rods, and anything in between. Shark ION P50 can also handle pet hair, deeply carpeted floors, and it even works fine of tile flooring. When used on the ION power mode, you can use this cordless vacuum cleaner for about 50 minutes which is quite long. However, if you are using the high suction setting its runtime will reduce and you’ll need to recharge it often. But you can always buy an extra battery so that your cleaning schedules will not be interrupted. The good thing about the interchangeable battery is that you can charge it in the vacuum cleaner or directly plugged it to the wall. Shark ION P50, also comes with a dust cup that is easy to empty and uses a washable HEPA filter that will get rid of 99.99 percent of allergens. Lastly, it is equipped with two brush rolls and one powerhead for cleaning big debris and fine dust on hard flooring and carpeted floors efficiently. 2) Shark ION F80 Cordless Vacuum
Our Shark cordless vacuum reviews will not be completed without including ION F80. This vacuum cleaner has a powerful suction that is ideal for picking up everyday pet hair, debris, and dirt particularly in areas with high traffic. Shark ION F80 also comes with two ion power pack system that includes a charging dock and two rechargeable and removable batteries (lithium-ion). Moreover, it uses DuoClean technology that is specially designed to deal with large debris and fine dust on both hard floors and carpeted floors. There is also a Multiflex technology that will allow you to clean under furniture conveniently. In fact, this allows you to bend the wand. When it comes to the running time, you will be able to use this cordless vacuum cleaner for about 80 minutes, when you consecutively use the two batteries. Another good thing about this product is that you can easily transform it into a hand vacuum cleaner. All you need to do is press a single button and you can clean above-ground areas right away. 3) Shark IONFlex 2x DuoClean Cordless Vacuum IF251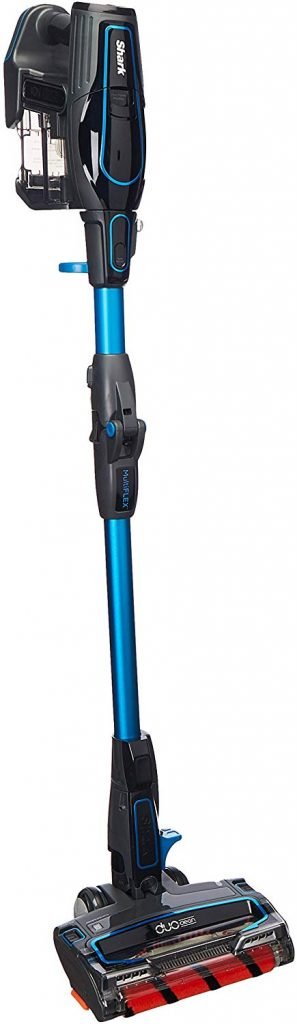
Similar to other products, Shark IONFLEX IF251 also uses a multiflex technology that will allow you to fold the unit for free-standing and compact storage. In fact, it also makes cleaning under tables, beds, and couches much easier. To activate this feature, simply hold down the “press to unlock” button and fold the vacuum cleaner forward gently towards the floor nozzle. As the name implies, the Shark IF251 also uses DuoClean technology. In case you didn’t know, this technology is a combination of soft roller and bristle brush invented to get rid of small and big particles as well as fine dust on carpets and hard floors. Further, this cordless vacuum comes with two removable lithium-ion batteries. Each battery will have a runtime of 30 minutes. By the way, you are allowed to charge it while using, as a result, you will have an uninterrupted cleaning experience. 4) Shark Rocket Pet Pro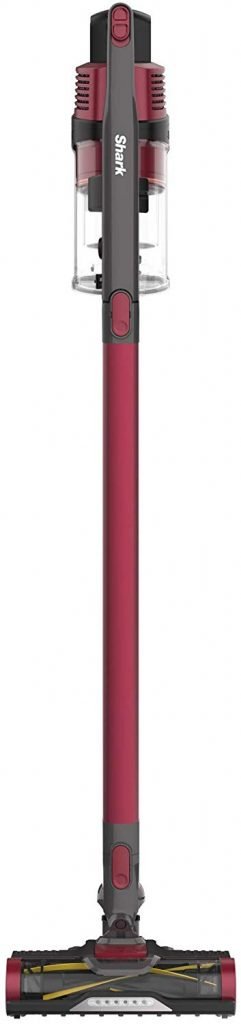
One reason why we have included Shark Rocket Pet Pro in our best Shark cordless vacuum reviews is that it has a powerful suction that is perfect for an entire-home cleaning. In fact, it effectively cleans tough stains and messes, dirt, debris, and pet hair. Further, this cordless vacuum comes equipped with a self-cleaning brush roll that has dirt engage technology. This technology, for your information, can offer unbeatable cleaning performance on bare floors as well as carpets. It even allows continuous removal of pet hair and long hair. When used in the Standard Mode, this vacuum cleaner will give you a runtime of 40 minutes. Another great thing about this unit is that you can charge the removable battery in the unit or at the bottom while you keep it elsewhere. Shark Rocket Pet Pro has a high-capacity dust cup meaning you don’t need to empty it often. When it comes to emptying it, actually, it is very hygienic, thanks to its feature called the CleanTouch Dirt Ejector. Additionally, Shark Rocket Pet Pro made with an ultralight frame that improves maneuverability and simplifies above-floor cleaning tasks. It also has LED headlights that can be found in the nozzle so that you will be able to see hidden debris with ease. 5) Shark Navigator Freestyle Cordless Vacuum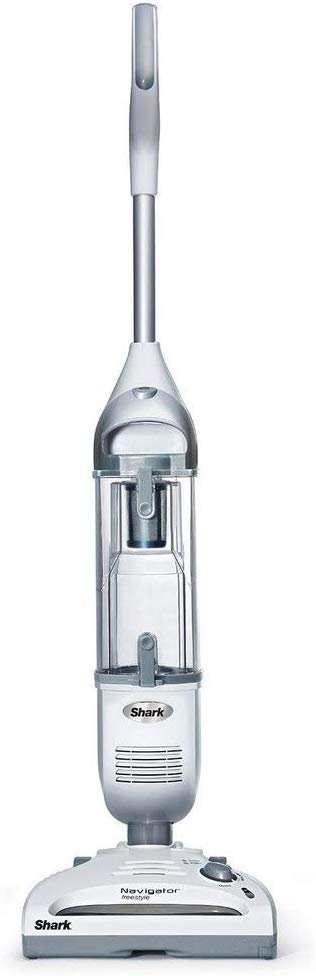
This upright, bagless, and cordless vacuum cleaner from Shark will surely give you a convenient and at the same time quick clean on surfaces of all types. Apart from that, Shark Navigator Freestyle will not only give your excellent cleaning on both carpeted and bare floors, but this cordless vacuum has also extended runtime and powerful suction power. Another great thing about this product is that it comes with an innovative swivel steering for superior control particularly when moving around furniture. In fact, this cordless vacuum from Shark comes equipped with a strong motorized brush that will lift pet hair that is embedded from the carpets, making it the best option for pet owners. Its 0.64-quart dust cup, on the other hand, can hold more debris and dirt, as a result, you will not have to empty it more often. ConclusionChoosing the best cordless vacuum that will suit your needs and budget doesn’t have to be difficult. We hope that our Shark cordless vacuum reviews have helped you a lot. The post Shark Cordless Vacuum Reviews appeared first on Vacuum Cleaners. via Vacuum Cleaners http://relentlesshome.com/shark-cordless-vacuum-reviews/?utm_source=rss&utm_medium=rss&utm_campaign=shark-cordless-vacuum-reviews
0 Comments
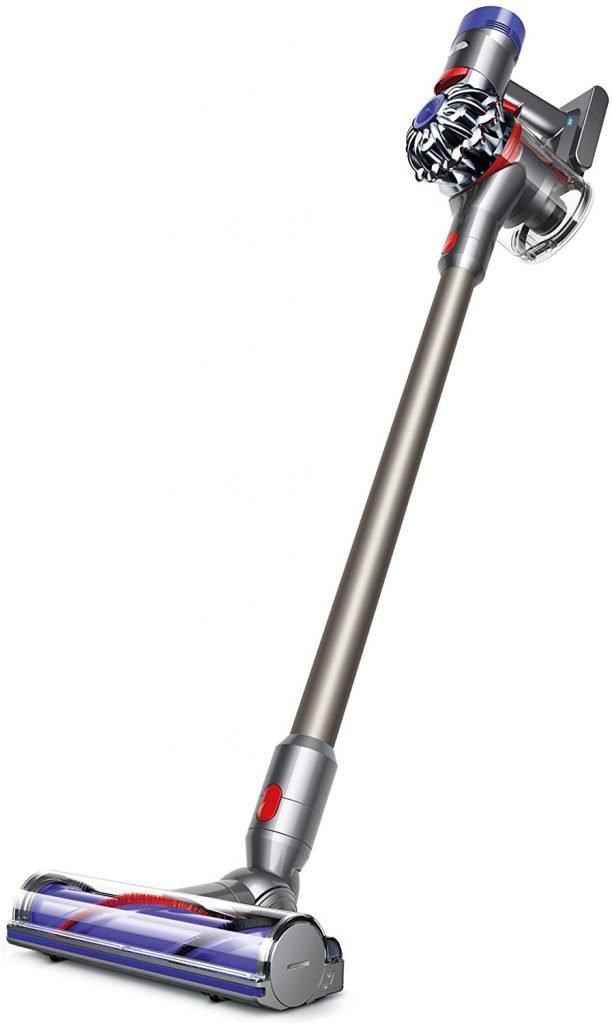
Due to their capabilities and features that make cleaning more efficient, safer, flexible and quicker, today, more and more brands or manufacturers are producing cordless vacuum cleaners. That being said, choosing the best one has never been an easy task. So, if you are in the market for the best cordless vacuum cleaner, but you’re a bit overwhelmed with the options available, then you may want to consider Dyson V8 Animal. Dyson, in case you didn’t, is one of the most popular names in the industry, for the reason that their cordless vacuums are of high-quality, reliable, safe and easy to use, reasonably priced, and efficient. However, if you’re having second thoughts about the product that we recommend, make sure to read our Dyson V8 Animal Review. Below, you will see what this cordless vacuum cleaner from Dyson has to offer. What is Dyson V8 Animal?This cordless vacuum was released last 2016 as an upgrade to the very popular V6 series of Dyson. Dyson V8 Animal is actually designed and made to enhance the Dyson V6 in many ways, like longer runtime, a redesigned emptying system, and stronger boost modes. Dyson V8 Animal, on the other hand, is marketed as one of the most powerful cordless vacuum cleaners today that can beat corded units when it comes to cleaning performance and suction power. What’s more, it uses the direct-drive cleaner and detachable handheld design of Dyson. Features of Dyson V8 Animal
Dyson V8 Animal is a stick cordless vacuum that has a detachable handheld mode. It also has a lightweight design that will allow you to maneuver the unit from one place to another without any trouble. Furthermore, this vacuum cleaner is very comfortable to hold and take note its battery replacement will balance the weight of its Dyson digital V8 motor. When it comes to the direct-drive cleaner, it has a tiny “ball” joint that allows you to move around obstacles and furniture with ease.
As mentioned a while ago, Dyson V8 Animal is a powerful vacuum cleaner since it is powered by the V8 motor of Dyson. Actually, this motor can offer 115 air wattage. Its direct-drive cleaner head features a powered brush bar that is ideal for digging deeper into the fibers of the carpets and getting rid of more dust and dirt. Moreover, the combination of powerful suction and brush bar will allow you to clean pet hair, dust, and dirt around your home more rapidly. Dyson V8 Animal is also a versatile cordless vacuum cleaner that you can use everywhere in your home. This unit also has a MAX power mode that is responsible for giving an increase in suction for dealing with tough and stubborn messes. Without a doubt, this is extremely beneficial, but it is worth mentioning that this power mode will reduce the runtime of up to 7 minutes.
This Dyson V8 Animal review will not be completed without mentioning the unit’s battery life as well as charging time. With this cordless vacuum cleaner, you will expect a runtime of 40 minutes. But, you can only achieve if you are using a non-powered tool. If you use the turbo tool or direct-drive cleaner head, the runtime will only become 25 minutes. Nevertheless, it is still long compared to the 20-minute runtime of Dyson V6. Keep in mind that the 25-minute runtime of Dyson V8 Animal will give you enough time to clean your as it comes with tools that make cleaning much easier. The boost mode, on the other hand, that only gives a runtime of seven-minute is best suited for dealing with stubborn pet hair and spot cleaning. When it comes to the charging time, approximately, it will take five hours according to Dyson.
Dyson Animal V8 comes with motorized, large brush head, a smaller motorized head for cleaning stairs, and a crevice tool. There is also a floor head that has rotating brush bars. One more thing, this cordless vacuum cleaner comes with a turbo tool and direct drive head. Dyson V8 Animal also has a docking station that is wall mounted. However, you are not obliged to use this tool since you can simply charge this unit using standard cords.
Dyson V8 Animal uses a great filtration system that does an excellent job of preventing allergens such as pet dander, dust, and debris from escaping once collected. This is because of the combination of post-motor and primary filters as well as cyclonic action.
Dyson V8 Animal comes with a dust bin that is large enough to complete home clean without the need to empty it more often. When it comes to emptying the bin, in fact, it is pretty easy. This cordless vacuum cleaner features a collar emptying system. It means, once you pull the lever, the silicone collar will push the contents out instead of depending on gravity. As a matter of fact, it is extremely beneficial if you have asthma or allergy.
Truth be told, Dyson V8 Animal is a bit pricey cordless vacuum. Sure enough, it is not cheap, but the range of features and benefits, as well as cleaning performance, justify its price tag. So if you are looking for a great cordless vacuum cleaner and you are willing to spend any amount, then look no further than Dyson V8 Animal. What We Liked
What We Didn’t Like
ConclusionNow that you have an idea about what Dyson V8 Animal has to offer, are you now planning to get one? If yes, then that’s great, if you’re still a bit hesitant, you need to read this Dyson V8 Animal Review again so that you will see what are the things you’re ignoring. The post Dyson V8 Animal Review appeared first on Vacuum Cleaners. via Vacuum Cleaners http://relentlesshome.com/dyson-v8-animal-review/?utm_source=rss&utm_medium=rss&utm_campaign=dyson-v8-animal-review 
With so many vacuum cleaners available in the market today, finding the best one is quite a challenge. There are different types of vacuum cleaners with specific features that make it more confusing. In situations like this, you need to focus on the things that you want your vacuum cleaner to have. Read Here: Best vacuum under $200 To help you decide on which to choose, here are some of the best vacuum cleaner under $300: 10 Best Vacuum Cleaners Under $300 Reviews1) Shark DuoClean Powered Lift-Away NV803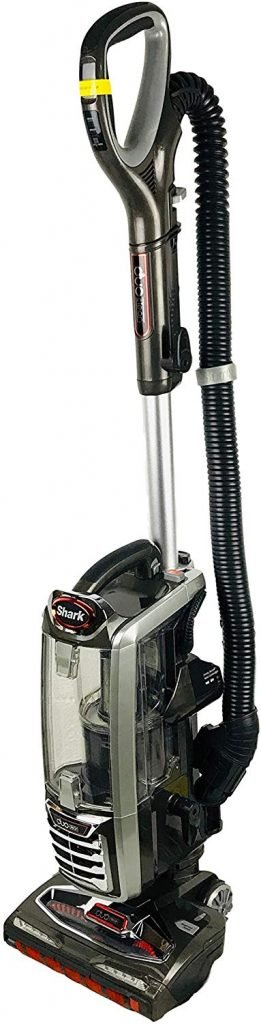
This vacuum cleaner is best for any type of floors including carpets that can provide deep cleaning and leave the floor shiny and clean. The Shark DuoClean Powered Lift-Away NV803 comes with an under appliance wand and LED light that helps you sweep dirt on corners, edges, and darkest spots in a room. It has a HEPA filter technology to help control allergens and maintain the cleanliness in your home. Pros: It has a strong suction, long power cord, and button to easily switch from soft brush to bristle brush. Cons: It has a small dust bin. 2) Bissell Pet Hair Eraser 1650A Upright Vacuum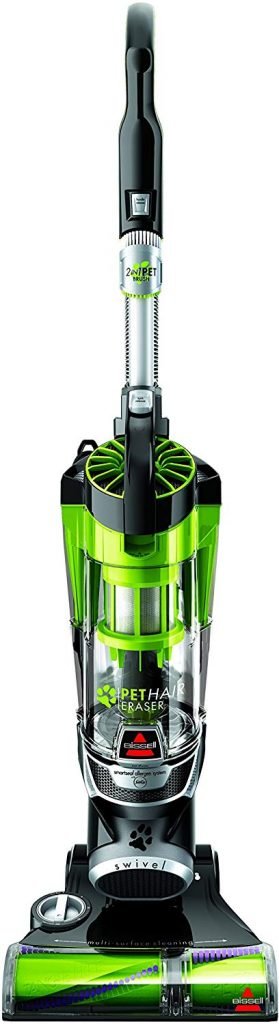
This vacuum from Bissell is made especially for pet lovers out there. Bissell Pet Hair Eraser 1650A Upright Vacuum has a turbo eraser technology to get hair and fur tangled on the carpet. It comes with a 2 in 1 pet brush and brush roll with 8 ft. hose to ease your cleaning routine. Pros: It has powerful edge-to-edge suction, very efficient on removing pet hair, and get rid of the bad smell on the flooring. Cons: It is heavy compared to other similar vacuums. 3) Shark Ion Flex 2X DuoClean Cordless Ultra-Light Stick Vacuum IF251
This vacuum made it to the list because of its versatility and multiflex technology. Shark IONFlex 2X DuoClean Cordless Ultra-Light Stick Vacuum IF251 has a flexible wand that you can bend to reach high-traffic areas. It’s a cordless vacuum that can also be easily converted to a handheld device. Pros: It can be used up to 50 minutes, fold for easy storage, and has a 5-year warranty for the vacuum and batteries. Cons: It has a small dirt cup that could not serve a spacious area. 4) Shark Ion Robot Vacuum R75 RV750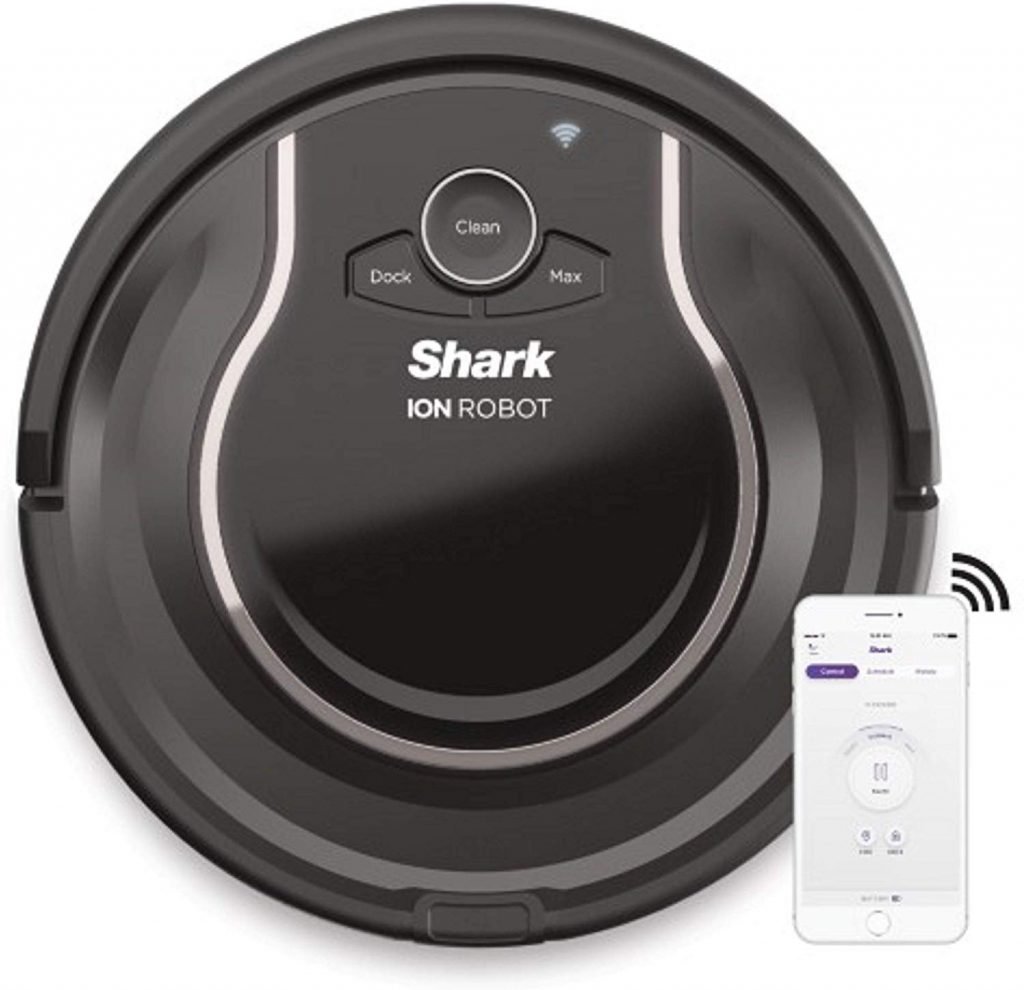
This vacuum is one of the most effective robot vacuums in the market. Shark Ion Robot Vacuum R75 RV750 work using a Wi-Fi connection and can last up to an hour of cleaning different types of surfaces. With just a single touch and smart sense navigation, you can control the robot vacuum and maneuver under furniture. Pros: It uses an advanced technology that is easy and effective cleaning with a one-year limited warranty. Cons: It has a small dirt capacity. 5) Eufy Boost IQ Robovac 15C Robot Vacuum![eufy [BoostIQ] RoboVac 15C, Wi-Fi, Upgraded, Super-Thin, 1300Pa Strong Suction Quiet, Self-Charging Robotic Vacuum Cleaner](http://relentlesshome.com/wp-content/uploads/2020/02/eufy-BoostIQ-RoboVac-15C-Wi-Fi-Upgraded-Super-Thin-1300Pa-Strong-Suction-Quiet-Self-Charging-Robotic-Vacuum-Cleaner-949x1024.jpg)
This vacuum is made for low and medium-pile carpet that has wheels to climb on door ledges and stairs. Eufy Boost IQ Robovac 15C Robot Vacuum has uses special features like a trace button if ever lost inside the house and drop sensing indicator to avoid from falling. Another amazing detail of this vacuum is its capability to self-charge and return to its charging base when the power is low. Pros: It has multiple cleaning modes, quiet, and auto-cleaning timer. Cons: It is not ideal for high pile carpets. 6) Miele Classic C1 Pure Suction Vacuum Cleaner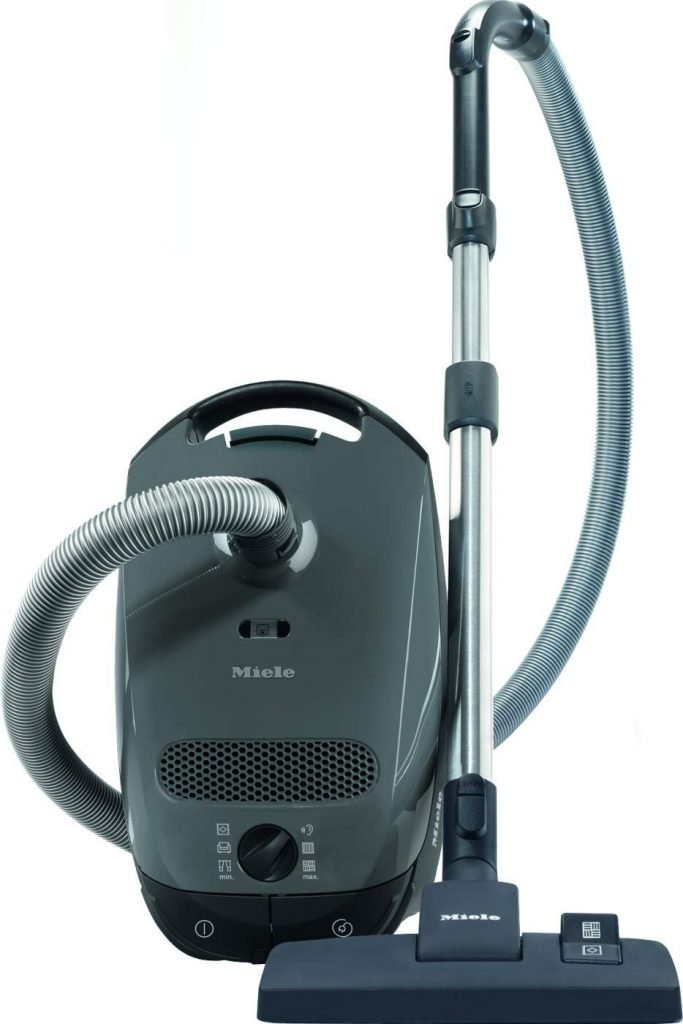
This vacuum is a very durable, versatile, and efficient cleaner that is under $300. Miele Classic C1 Pure Suction Canister Vacuum Cleaner uses a Vortex motor with 1200 watts to power up its suction ability. Unlike other vacuum cleaners, this one has a metal sole plate which makes it easier to glide across surfaces. Pros: It has powerful suction, lightweight, and easy to store. Cons: It has a short power cord and is not compatible with high pile carpets. 7) Shark Rocket Corded with Zero M Anti Hair Wrap ZS351
This vacuum was created to deliver a comfortable and hygienic cleaner. Shark Rocket Corded Ultra-Light Vacuum with Zero-M Anti-Hair Wrap ZS351 has a combing device to get hair and fur from pets while it continues to clean the surface. It weighs only 9 pounds that you can turn to a handheld vacuum perfect for cleaning cars, rugs, and upholstery. Pros: It is excellent for deep cleaning carpeted floors, easy to control, and converts to a handheld vacuum with just a press of a button. Cons: It is a little noisy. 8) Severin Germany Special Bagless Vacuum Cleaner MY7118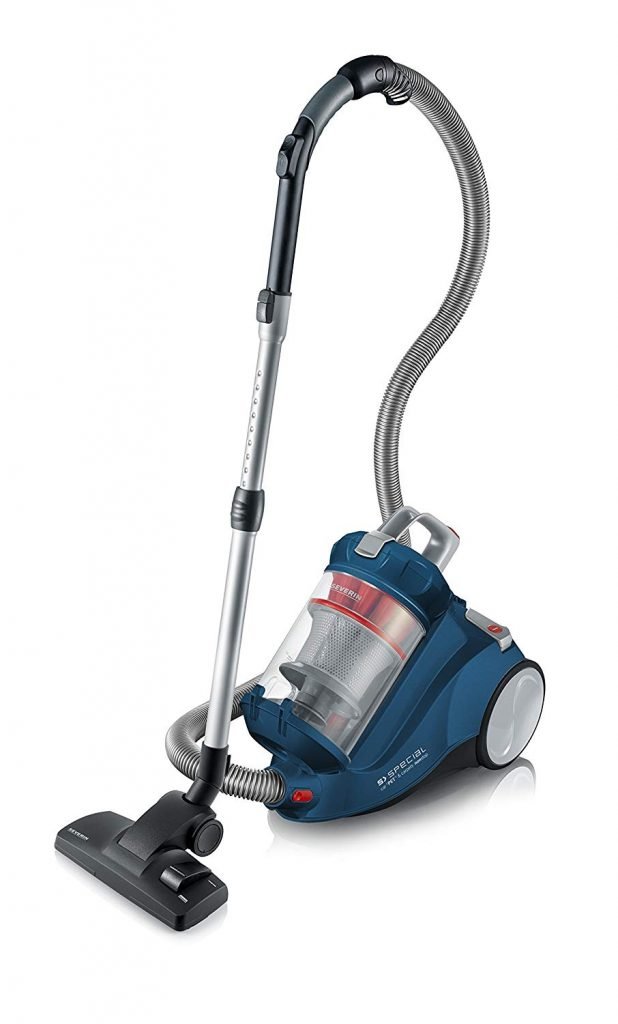
This vacuum came from a world-class manufacturer in Germany. Severin Germany Special Bagless Vacuum Cleaner MY7118 is a bagless cleaner that comes with an Eco-floor nozzle and claw-collect system to ensure that dirt and hair are absorbed. It uses HEPA 14 filter to help in keeping your house away from dust mites, pollen, and molds. Pros: It is very quiet, has excellent suction power, and HEPA filter which eliminates bad odor. Cons: It is a little heavy. 9) Dyson V7 Cord Free Handheld Vacuum Cleaner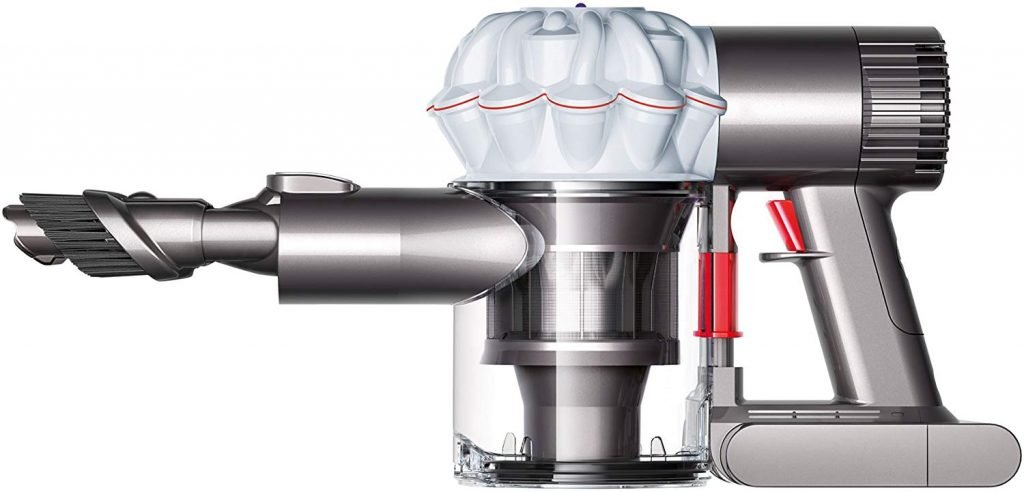
This vacuum is one of the most powerful and effective handheld cleaners that use motorized tools to clean up pet hair. Dyson V7 Car + Boat Cord-Free Handheld Vacuum Cleaner is suitable for cleaning cars, underneath furniture, and dirt between surface gaps and cracks. It also uses a hygienic ejector that removes trapped dirt inside to clean efficiently. Pros: It is very light which makes it easier to maneuver that comes with a 2-year warranty. Cons: It is not suitable for bare floor and a bit tiring to use due to consistently holding the trigger to keep it on. 10) Bissell Pet Hair Eraser Turbo Plus 24613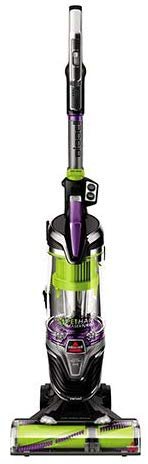
This vacuum comes with an extension wand to make it easier to clean hard to reach areas. Bissell Pet Hair Eraser Turbo Plus 24613 uses a SmartSeal technology that filters fine dust, pollen, and other allergens. Another great feature of this vacuum is a new and unique filter called Febreeze that gets rid of pets odor. Pros: It has excellent pet hair attachment, unique filter, and excellent maneuverability. Cons: It is a bit bulky to store due to its separate turbo tool. ConclusionThe first thing you need to check about a vacuum cleaner is its cleaning performance, can it remove dirt, dust, debris, hair, and allergens? Second, what are the attachments that are included in the package? And lastly, does the price match the quality? If it’s a yes, then you have found your perfect vacuum cleaner. The post 10 Best Vacuum Cleaners Under $300 appeared first on Vacuum Cleaners. via Vacuum Cleaners http://relentlesshome.com/best-vacuum-cleaners-under-300/?utm_source=rss&utm_medium=rss&utm_campaign=best-vacuum-cleaners-under-300 
Vacuum cleaner belts play a very important role in how a vacuum works. One good example is that a belt is responsible for transferring the power from the motor of the vacuum cleaner to the brush roller. However, despite the fact that the brush roller of a vacuum does not have to be in operation at all times for this cleaning tool to make a powerful suction having a properly matched and healthy vacuum cleaner belt is important to make sure that the vacuum will perform at its maximum potential. Nevertheless, if you are looking for Bissell vacuum cleaner belts then you are in the right place. In this article, we have compiled the best belts for Bissell Vacuum Cleaner where you can choose from. Best Bissell Vacuum Cleaner Belts Reviews1) Bissell 32074 Replacement Belts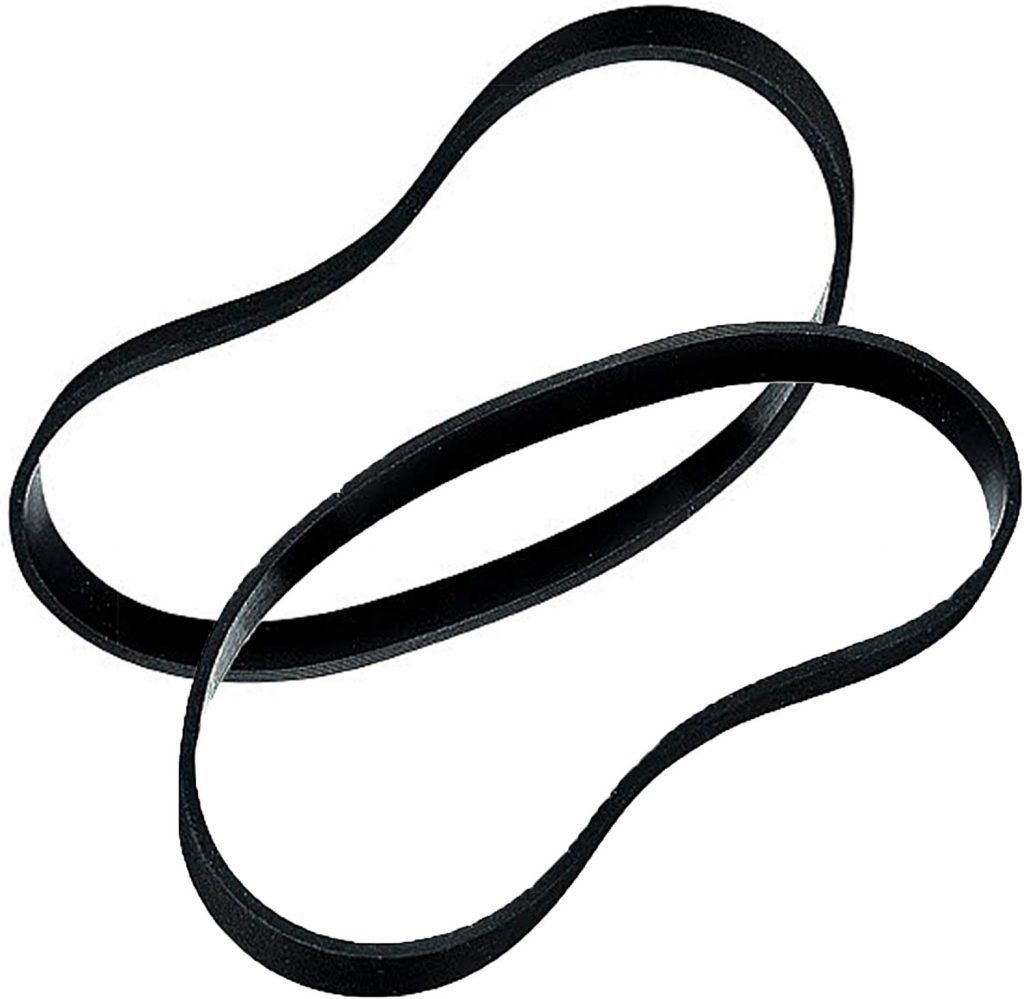
The Bissell 32074 is best suited for PowerGroom Helix Vacuum Series and PowerGlide Series vacuum cleaners. These replacement belts are made from high-quality materials thus you are certain that they will last until the recommended time you need to replace them. Moreover, with Bissell 32074 debris, dirt, and other allergens will be removed from your carpet and other types of flooring thoroughly. Nevertheless, this pack comes with two counts and it is available at reasonable price tags. When it comes to installing the belts, you can simply rely on the guide for the installation procedures. 2) Bissell PowerForce Compact Lightweight Upright Vacuum Cleaner Belt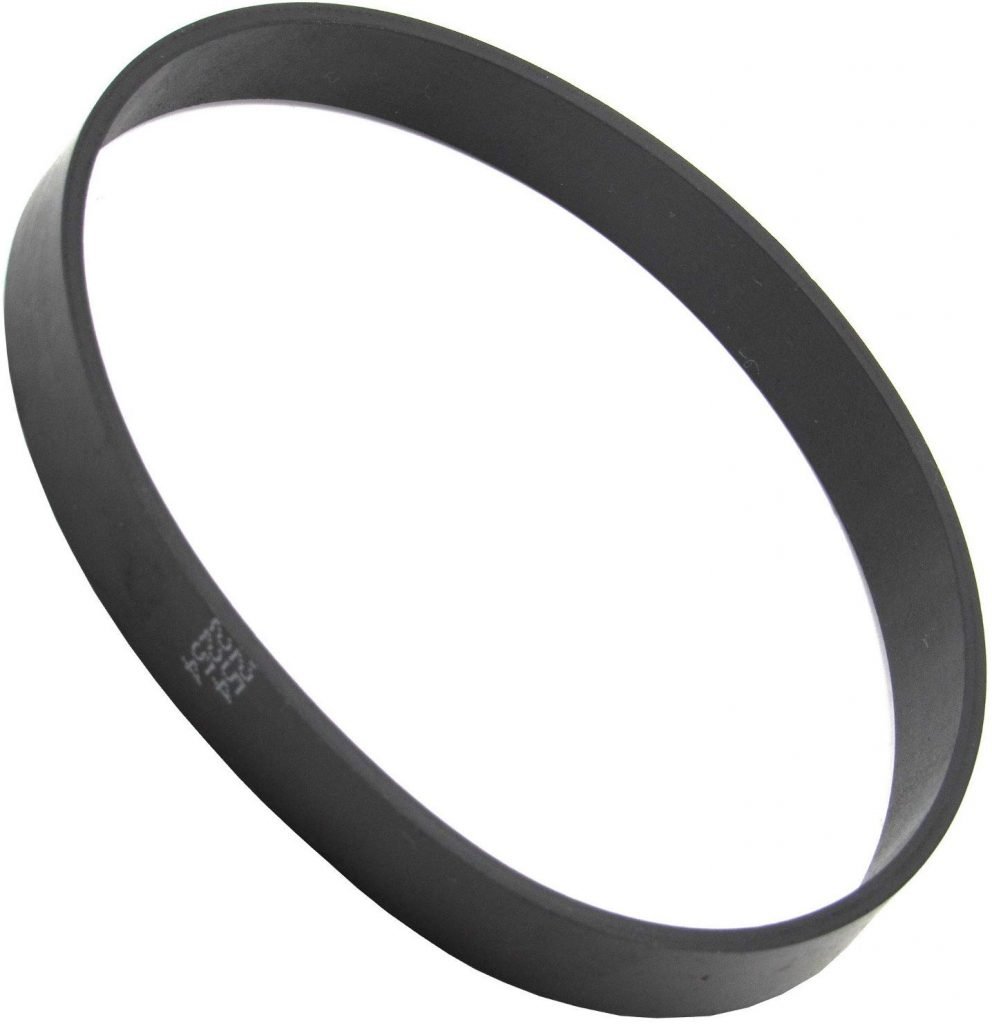
This list of best Bissell vacuum cleaner belts will not be completed without mentioning Bissell PowerForce. With a total dimension of 3.8-inch by 3.7-inch by 0.4-inch, this vacuum cleaner belt is ideal for a 1520 PowerForce lightweight upright vacuum. Furthermore, it is a flat type vacuum cleaner belt. In case you didn’t know this type of belt is the most commonly used these days. Additionally, it has more contact places to the motor shaft as well as the brush roller compared to other others types, specifically the round ones. Bissell PowerForce belts are also made from tougher materials that actually make them much sturdier. One drawback of this product is that it is not refundable. However, this minor issue should not stop you from buying this Bissell vacuum cleaner belt, because since you get it for as low as $5. 3) Bissell ProHeat Belt Accessory 6960W
This vacuum cleaner belt is best suited for deep cleaner units such as ProHeat 250A3 Series and ProHeat 7950, 7920, 7901, and 8910 series. But aside from that, Bissell ProHeat Belt Accessory 6960W can be also used on the following models:
Changing your vacuum cleaner’s belt with this product is pretty easy. In fact, it will not take you half an hour to finish the installation process especially if you are used to changing belts. Nevertheless, if it is your first time to install vacuum belts you can always rely on the user guide that comes in the package. 4) Bissell Lift-Off Replacement Belt 3200, Pack of 2
As the name implies, this vacuum cleaner belt is suitable for lift-off bagless vacuums. In addition to that, Bissell Lift-off belts work with model numbers 6850, 89Q9, 37606, 6860H, 42209, 37604, and 18Z6. Similar to other Bissell belts, this is one is also available at a cheap price tag. As a matter of fact, for as low as $7 you will get this pack of two Bissell vacuum cleaner belts on Amazon. Though it is not that expensive, make sure that you check if it suits the vacuum cleaner that you have to avoid wasting money. There you have it the four best Bissell vacuum cleaner belts in the market. How Often Should You Change The Vacuum Cleaner BeltAs a general rule of thumb, a vacuum cleaner belt needs to be changed one or two times every year. This is to ensure the vacuum cleaner will perform at its best and pick up dirt and debris better and faster. As the days go by, the rubber material will begin to breakdown and it becomes too loose. Meaning to say, it may start to slip and not grip the beater or roller brush like it should. Nevertheless, here are some of the common signs when it is the right time to replace the belt of your vacuum cleaner. Read Here: Best Vacuum Under $150: Top 5 Editor’s Picks
A vacuum cleaner needs to be checked thoroughly to see signs of tear and wear. A quick manual inspection may reveal tiny cracks or tears in the material. So, if these are noticeable, then you will need to change the belts as soon as possible so that the current situation won’t become worse. Another problem is that residue, hair, and fur may build upon any belts. Usually, this occurs when the unit is not cleaned regularly or when a big mess was sucked up.
Another noticeable sign that you need to watch out for is a burning smell. When you noticed this smell, make sure to switch off the vacuum cleaner immediately and don’t plug it until it is fixed. Most of the time, the smell of burning rubber is caused by friction from the rubber material on the wooden brush. But sometimes the collected fur and hair starts to burn. To avoid this from happening you need to inspect the belt regularly.
When the belts suddenly break, then it is an obvious indication that you need to change them. Though sudden break is not common, it does occur most especially if the warning signs are overlooked. Not only that, it may happen if the brush turns out to be snagged on something or when the vacuum cleaner picks up sharp things. Read Here: How to Replace Vacuum Belt Bissell ConclusionKeeping the belts of your vacuum cleaner is very important most especially if you want your unit to work efficiently. Nevertheless, if you have decided to buy one, you can consider any of the above-mentioned products. But make sure they are suitable for your vacuum cleaner. And since vacuum belts are not too expensive, we highly recommend that you keep spares so that when your vacuum belts suddenly break, your cleaning schedule will not be interrupted. The post Bissell Vacuum Cleaner Belts: Which One Should You Pick? appeared first on Vacuum Cleaners. via Vacuum Cleaners http://relentlesshome.com/bissell-vacuum-cleaner-belts/?utm_source=rss&utm_medium=rss&utm_campaign=bissell-vacuum-cleaner-belts Floors are abused regularly— from the daily traffic it endures to the inevitable spills and pet accidents. Just think about all the dirt, grime, dust and debris that the outside brings and adding pets and kids to the mix creating a whole new level of mess and dirt. Read Here: Best Multi-Surface Vacuum Cleaners – The Ultimate Guide And a dirty hardwood floor is not simply unhygienic. It can also be damaging to the wood itself, which is quite expensive to repair or worst, replace. Keep your hardwood floors polished, clean and always looking fresh with these smart cleaning methods. Read Here: How Often Should You Change Your Vacuum Bags? 
1) Preventive MeasuresThe best way to clean your hardwood floors starts by following smart preventive measures. This does not only help protect floors but also reduce the time that you spend cleaning your floors. Place floor mats both inside and outside exterior doors in order to reduce tracked-in dirt. During rainy or snowy weather, make sure to set up a boot removal area in order to avoid damaging the hardwood floor with tracked-in de-icing agents and water. Adding a small bench to sit down and a place to store shoes, you can also keep a cleaning cloth or rug tucked away next to the shoe organizer in order to clean up puddles. Always remove shoes outside. This is to prevent grime, dirt, and germs from getting inside all over the house. This is especially true for cleats and heels that can scratch hardwood floors. You can also prevent marks on your wood floors by using floor protectors and placing rugs in play areas, ensuring that your kid’s toys will not scratch the floor. 2) To Vacuum or To Sweep?To keep your floors clean and maintain its integrity, you will need to do both, vacuum and sweep with a broom.
One of the most popular ways to clean your hardwood floor is to use a vacuum cleaner. And there are a variety of vacuum choices suitable for hard surface flooring. The vacuum needs to have enough suction to easily suck dirt and dust. Also, it needs to be lightweight with wheels in order to prevent scratches on your floors. Thus, cordless stick, canister vacuums, and upright vacuums are the most popular choices. When vacuuming, make sure to pass on the same area multiple times and in different directions. This is to ensure that all dirt and dust are removed effectively. You can vacuum your hard floors weekly or biweekly.
Now, for the days that you would just rather not deal with the vacuum or only need to clean a smaller room, your broom can do wonders or cleaning your hardwood floors. There is absolutely nothing wrong with using the old-fashioned broom but there are more efficient ones available to sweep your hardwood floor more effectively. Also known as dust mops, microfiber brooms replace the standard bristle head with a microfiber cloth. This can be reusable and machine washable or disposable. Dust mops are great in attracting and picking up dust, dirt, and hair rather than just pushing it around the floor. Regardless of what you use, daily brooming is a must. And when you do, make sure to sweep your floor a couple of times in order to ensure that all dirt and debris are removed. 3) Mopping Wood FloorsVacuuming and sweeping your hardwood floor don’t remove all dirt and grime on your floor. Over time, this dirt, grime, and oil accumulate, making them harder for vacuums and brooms to fully remove them. The best way to remove them? Mopping your floor. In a bucket of water, add a few drops (or according to the manufacturer’s instruction) of wood floor cleaning products. If you want to clean your floors naturally, you can also use ingredients from your kitchen and baking soda. Just add half a cup of vinegar and some baking soda to a gallon of water. Take note, however, that vinegar can dull some hardwood flooring finishes so make sure to test the solution first before completely cleaning the entire flooring. Saturate the mop and wring it almost dry. Mop the floor while being careful to prevent standing water on the floor. Then, rinse with a clean mop. You can wipe the excess liquid since standing water can damage wood surfaces or just place a ceiling fan to speed up drying times. 4) Removing StainsWhen trying to remove stains from your hardwood floor, you need to consider the floor’s finish first. If the stain is just on the surface, your floor probably has a hard finish like urethane. However, if the stain has penetrated through the wood, then your floor might have a soft-oiled finish. For a hard finish, wipe the surface stain with a clean and soft cloth or rag. Don’t use steel wool, sandpaper or any harsh chemicals since it can damage the floor finish permanently. Now for the hardwood floors with soft-oil finishes, we included some remedies to try. If needed, consider ending each treatment by staining the floor then waxing and buffing the spot in order to match the rest of your flooring.
Rub the spot with a soft rag and dish detergent in order to break down the grease. After that, rinse with clear water. In case one or more application didn’t work, you will need to repeat the procedure. Make sure to keep pets and kids out of the room until you are done. Allow to dry and smooth the raised grain with fine sandpaper.
Rub the affected area with floor wax and a No. 000 steel wool. In case the spot is still dark, make sure to apply vinegar or bleach. Allow the liquid to soak into the floor for at least an hour. Then, rinse with a damp cloth.
Similar to removing dark spots and pet stains, use floor wax and a No. 000 steel wool to remove white stains and watermarks. In case the stain goes deeper, sand the floor lightly and clean with odorless mineral spirits and fine steel wool. The post How to Clean Hardwood Floors the Right Way appeared first on Vacuum Cleaners. via Vacuum Cleaners http://relentlesshome.com/how-to-clean-hardwood-floors/?utm_source=rss&utm_medium=rss&utm_campaign=how-to-clean-hardwood-floors 
Keeping your carpet clean at all times requires a lot of hard work. With kids and pets around, expect a carpet full of dirt, spilled juice, and messy food. And even if you want to, vacuuming your carpet every single time is next to impossible. So how can you prolong the lifespan of your carpet? Here are 20 tips and tricks for cleaning your carpet according to the professionals: 1. Prepare the carpet for vacuuming.Make sure that there are no objects such as toys, papers, or coins that will block the way of the vacuum cleaner. You should dust the furniture, blinds, and shelves first so the falling dust can also be vacuumed. Read here: How Often Should You Change Your Vacuum Bags? 2. Use vacuum cleaner attachments like nozzle to clean hard to reach areas.Crevice tool, dusting brush, and extension wand are some of the attachments you can also use for different areas. Especially for heavy furniture, instead of moving and carrying, using a specific attachment can make your job a lot easier. 3. Vacuum in different directions, both horizontally and vertically.Carpet fibers are usually twisted and vacuuming in all directions can ensure that every part of the carpet has cleaned thoroughly. Start vacuuming the carpet forward and back the going from left to right. 4. Set a schedule on how often you need to clean your carpet.Vacuuming regularly doesn’t mean once, twice, or thrice a week. It depends on how dirty, hairy, and soiled your carpet from the pets and other sources. 5. When cleaning the carpet using a rag.It’s better to use white cloth rather than dyed or patterned rags as the color may transfer to the carpet. Paper towels are also a great alternative and adequate solution for cleaning fresh stains. Also, avoid using brushes because it may damage the carpet fibers. Read More:
6. Choose the right solutionThere are lots of commercial carpet cleaners available in the markets that come in spray bottles or can form. It is important to choose the right solution for a specific stain and carpet type. Carefully read the label and make sure that it can clean both fresh and dry stains. 7. Before using the carpet solution.You should try to apply it to a small area on the carpet. Do not put it directly on the stain as it can wash the dye of the carpet. Some products are not compatible with the type of carpet you have so it’s best to test it first. 8. Avoid scrubbing the carpet.Instead, gently dab the affected area using white cloth with a little amount of the solution. Rubbing the carpet vigorously will make the stain harder to take off. Minimize the use of cleaners or soap as it may attract more dirt when left on the carpet. 9. Using water and clean white cloth.Rinse the remaining soap on the affected area on the carpet. You don’t need to soak the carpet into the water because the pad beneath may absorb the water which can cause mold and fungus. When the stain is not visible anymore, allow the area to dry completely. 10. Must clean the room first.If you are planning for carpet shampooing or steam cleaning, you must clean the room first. Remove the furniture, if possible, to protect it from any water damage. But if not, you can cover it using plastic, aluminum foil, or wax paper and place under the furniture’s feet. Read Here: Steam Cleaner vs Vacuum Cleaner 11. Check the cleanerGet a carpet shampooing machine with an appropriate cleaning solution for your carpet. Check the cleaner if it has a built-in heating core to keep the water hot. You can either purchase or rent carpet shampooer because a lot of markets offers rentals for carpet cleaners. 12. Make sure it has dried.Once the carpet has been fully cleaned, you need to be careful not to walk on it until it has dried. When you start cleaning the carpet, begin at the farthest part from the door so you can work your way out. Plan your exit carefully so you will stay away from the corner. 13. Try not to add much soap.Cleaning solutions usually come with shampoo or detergent that you can find in the market. Pour a small amount in the water inside the container according to the procedure on the bottle. Try not to add much soap because it may damage the machine and the carpet as well. 14. Some detergents may be harmful.So you should not be barefooted when cleaning your carpet. You can wear socks, plastic covers, or booties to protect your feet. Never wear shoes while cleaning to avoid attracting dirt into the carpet. 15. Carpet cleaners are designed to release water.As you push the machine and suck it up when you pull it back. Allow the extractor to get as much as water to the carpet to avoid leaving it too wet. If this happens, the carpet pad may absorb to much water and results in building molds and fungus. 16. To make sure that the carpet dries up well.Open the doors and windows and let the air circulate. If not possible, use the air conditioners, carpet dryers, fans, blowers, or air movers for fast drying. It may take 6 to 24 hours to dry the carpet depending on the method you chose to use. 17. Sometimes, soap residue remains on the carpet even after cleaning it.To clean the carpet thoroughly, you can use a mixture of vinegar and water to remove remaining detergents. It is recommended to clean it carefully because the longer a stain occurs, it will be more difficult to remove it. 18. Remove anything such as food and drinks away from the carpet.It is more difficult to clean this type of flooring compared to others like textiles. That is why the kitchen and dining rooms usually don’t have carpet flooring. 19. Training your pets properly can avoid having dirt to carpets.If your pets have a litter box, make sure to place them far away from the carpet for easy cleaning. But if it can’t be helped, you can buy a rubber litter mat and put it under their litter box to maintain a clean carpet. 20. Take care of the stains as soon as possible.To stop it from spreading throughout the carpet. Don’t rush yourself when cleaning the carpet, go over several sections with more than one pass. That way, you are 100% sure that ground-in dust and dirt are removed. ConclusionCarpets keep your feet warm due to thermal insulation and resistance, which makes it good for sitting, playing, or even working. There are different types, textures, and designs of carpets that would make a great backdrop to a room. A clean and comfortable carpet can add beauty and style to your home. Do you have any additional tips for better carpet cleaning? Share it now! The post 20 Carpet Cleaning Tips & Tricks from Pros appeared first on Vacuum Cleaners. via Vacuum Cleaners http://relentlesshome.com/carpet-cleaning-tips/?utm_source=rss&utm_medium=rss&utm_campaign=carpet-cleaning-tips 
How to make a tile floor shine? Tiles are the most sought-after flooring solution in most homes due to their attractive and shiny appearance. However, tile floors eventually lose their shine over time due to wear, stains and dirt. And such dull floors can make the whole room look old and outdated. So, instead of ignoring those dull floors, make sure to give them a new life and restore them to their former shiny glory. Read Here: Best Cordless Vacuum For Pet Hair- The Ultimate Guide So, how to make a tile floor shine? Here’s some quick tips to help you with! 1) Sweep and VacuumFirst off, you need to start by sweeping and vacuuming your tile. Both are important and together they help in removing the debris and dirt that has built up on your tiles. You can simply sweep your tile floors lightly then vacuum them afterward. Using the brush roller of your vacuum is fine since it won’t scratch your floor. Tile is not concrete or stone— rather it is a porous clay that has been hardened. However, it is still prone to damage, and loose dirt can scratch and damage it permanently. So, light sweeping and vacuuming can pull off the damaging dirt off your tile flooring. 2) Use Natural Solutions To CleanOnce you removed all large particles from your tile floor, it is time to start a deeper clean of your tile to make it shinier. Although you can use the more powerful chemical cleaning solutions you bought from the grocery store, they are not that safe and cost a lot of money. Use natural ingredients instead.
Most of the time, a soap and water solution is enough when mopping your tile flooring. Mopping should be done every now and then in order to prevent dust and dirt buildup on the floor. Make sure the mop is wrung thoroughly before using it on your tile flooring. In addition, you should change the solution once it becomes dirty. When there are tough stains, a sponge or a soft brush can be used to gently scrub the spot. After that, the entire floor should be rubbed with a soft towel in order to absorb the soap solution. It can also be rinsed with clean water, if necessary.
A natural kitchen product, vinegar can be used to disinfect and clean stained or soiled tile floorings. Unlike chemicals, vinegar can effectively clean your soiled tile flooring without the harsh fumes. Also, once it dries up, vinegar also leaves a natural and fresh scent. To use vinegar when cleaning a tile floor, mix a small amount with warm water. Dip the mop into the vinegar solution and mop thoroughly, allowing the floor to air dry. When tough stains occur, sprinkle the still wet tile with baking soda, scrubbing it with a rag before wiping it again with the mop solution.
Ammonia is a great ingredient to make your tile flooring bright and shiny. Also, it can be used to remove dirt and stains from the tile floors. Mix a bit of ammonia with warm water and use a mop to clean and disinfect your tile floor. Just make sure to rinse off the ammonia solution with clean water in order to remove any lingering solution.
Widely used in cooking, baking soda is also an all-around cleaning solution. In particular, baking soda can be used to remove tile tough grout and tile stains if your floor appears to be discolored and dirty. As a matter of fact, baking soda is considered as a natural tile polisher, rejuvenating your tile floors. In order to use it, combine an equal amount of warm water and baking soda in order to create a thick paste. Using a soft-bristled brush, gently scrub your grout and tiles. Then allow the solution to sit for at least 10 minutes then rinsing with warm water. Consider repeating the process to remove the tougher and more obvious stains on tile floors.
Now, for the toughest dirt scum buildup on your tile floor, you can fight it off and return its former shine by combining powerful cleaners. Mix ½ cup ammonia, ½ cup white vinegar, ¼ cup borax, and 1-gallon warm water. Use this cleaning solution to mop your tile floor or spray on the soiled surface. Rinse the floor well and allow it to air-dry.
A great cleaning agent for tile floors, especially porcelain, dish soap is not that powerful so it will not damage your flooring. However, if you need some power, adding rubbing alcohol and vinegar should do the trick. Just mix ¼ cup rubbing alcohol, ¼ cup vinegar, 1teaspoon dish soap, and 1-gallon warm water. Then, use it to mop the floor or spray onto the floor. Just be careful not to scrub too much since you will create lots of suds. This will require you a couple of rinses. Read More:
3) Adding High Gloss Tile SealerNow, once you cleaned your tile floors, a high gloss tile sealer can be applied in order to give it an extra shiny boost. Also, a high gloss tile sealer should help protect your flooring and keep it looking great for longer. High gloss tile sealers come in various types so make sure to choose one that is specifically designed for the type of tile you have. The majority of high gloss sealers are suitable for stone tiles with porous surfaces instead of ceramic tiles. Read Here: 10 Vacuum Cleaning Tips for Your Floors Not, make sure to test the high gloss sealer first on sample tile first in order to make sure that it bonds well, especially for ceramic tiles since this can cause issues. Take note, however, that a topical sealer can fade or become scratched over time. Thus, you will need to reapply it again for shiny and attractive tile flooring. ConclusionDirt, dust and pet dander are transferred to the tile floor. When this dirt accumulates and neglected, your once gorgeous and shiny tile flooring becomes dull, dirty and unattractive. Thus, it is important to keep your floors clean to maintain its shine. And by using the methods mentioned above, you can make your tile floorings not only squeaky clean but also attractively shinier than ever before! The post How To Make A Tile Floor Shine? appeared first on Vacuum Cleaners. via Vacuum Cleaners http://relentlesshome.com/how-to-make-a-tile-floor-shine/?utm_source=rss&utm_medium=rss&utm_campaign=how-to-make-a-tile-floor-shine 
Ceramic tile shower looks elegant and is extremely durable and versatile. However, for you to maintain its great design and sparkle, you will need to take care of it properly. In fact, this is also important, so that your ceramic tile shower is in good condition all the time. Read Here: How Often Should You Dust Your Home? If you are wondering how to clean ceramic tile shower, then this article is for you. Below, you will find out some of the best and most effective methods when it comes to cleaning a ceramic tile shower. Method #1: Use Baking Soda Paste and Vinegar Solution
For the first method, you will need to mix the baking soda to water to make a paste. The paste, however, must have the consistency that toothpaste possesses. If the mixture is thin, you can add more baking soda until you achieve the desired thickness. After making the paste, you can now proceed in preparing the vinegar solution that is pretty easy to do. All you need to do is mix vinegar with a bowl of water. Then transfer it in a spray bottle. Once you have made the paste, apply it using a sponge. Make sure to spread the baking soda paste over the ceramic tile shower. What’s more, you should apply generous amounts in between the tough stains and ceramic tiles. After that spray the paste using the vinegar solution. In case you didn’t know, the vinegar reacts with the baking soda, that makes it bubble. Also, the vinegar will help the paste eat over the dirt or stain. Then, scrub your tile in a circular motion using a scrub brush with a stiff bristle. You can also use pressure in order to get rid of mildew and tough stains from the ceramic tile. If you think that the stains were removed already, rinse the tile shower using warm water. Make sure to rinse the tiles for about 3-5 minutes. Finally, dry the ceramic tile shower using a clean and dry towel. Doing so will prevent the water from pooling in the crevices and corners that will aid in the prevention of mildew and mold development. Method #2: Use washing soda cleanserAnother method that you can try when it comes to cleaning ceramic tile shower is to use washing soda cleanser. To come up with a cleaning solution, simply combine1/2-cup of washing soda or water softener, two tablespoons of rottenstone – it is a finely powdered rock abrasive that is usually utilized in woodworking. After preparing the solution you can now start cleaning. All you need to do is dip a clean sponge that has an abrasive side in the solution. Then scrub it to the ceramic shower tile. Lastly, rinse it using cold water. As a piece of advice, before you start make sure to try the abrasive side of the sponge to the tile to ensure that it will not leave any scratch. Methods #3: Use Commercial Ceramic Tile CleanersThis is perhaps the easiest method that you can try most especially if you don’t have enough time to prepare a cleaning solution. Today, there are plenty of commercial ceramic tile shower cleaners in the market. However, keep in mind that not all of them are created equal. That being said, make sure to opt for one that has a good quality and safe to use. You should also keep in mind that some of these cleaners consist of harsh chemicals that may bring damage to your ceramic tile shower instead of keeping it clean. So before you make a purchase make sure to obtain information as much as you can about the commercial cleaner that you are considering. Nevertheless, using such cleaners is pretty easy. All you need to do is follow the instructions provided by the manufacturer which is usually located in the product’s label or packaging. By the way, make sure to wear a mask and a pair of gloves if you decided to try this method. Because as mentioned, some cleaners come with strong and harmful chemicals. Method #4: Use tea tree oilIf you want to keep mildew and at the same time mold at bay, consider wiping your ceramic tile shower after every bath. For this method, simply combine two teaspoons of tea tree oil and two cups of water. Then transfer it to a spray bottle to make the application much easier. Once the solution is already settled, you can spray it to the ceramic tile. DO NOT RINSE IT. However, if you don’t have a tea tree oil available, you can make another solution by mixing one cup of water and 1/2 cup 3% hydrogen peroxide. Spray onto the ceramic tile to kill mildew and mold. Keep in mind that these bacteria are not good for our health. Thus getting rid of them as early as possible is extremely important, nevertheless, after the hydrogen peroxide is completely dry, you can clean the tile as you regularly do. Read More:
Other Tips That You Can Do to Keep Your Ceramic Tile Shower Clean1) Spray vinegar solution to your ceramic tileBy simply doing this twice or thrice a week, you will be able to keep your ceramic tile shower clean for a longer period of time. However, if you have kids at home make sure to keep the vinegar solution in a hard-to-reach place. And for easy access and to avoid confusion, label the spray bottle with “ceramic tile shower spray”. 2) Wipe your ceramic tilesAnother great way to clean your ceramic tile shower is to wipe it five to seven times a week every after a bath. Doing so will prevent mold and mildew development that may cause serious damage to your ceramic tile. ConclusionThere you have it the four methods on how to clean ceramic tile shower. Nevertheless, cleaning your ceramic tile shower doesn’t have to be difficult. As long as you know what you are doing, you will be able to keep the tile sparking and in good condition The post How to Clean Ceramic Tile Shower: Top 4 Methods That You Can Try appeared first on Vacuum Cleaners. via Vacuum Cleaners http://relentlesshome.com/how-to-clean-ceramic-tile-shower/?utm_source=rss&utm_medium=rss&utm_campaign=how-to-clean-ceramic-tile-shower 
Spills happen. Whether its a magic marker mishap, those muddy paw prints, or an errant cup of coffee, rugs, and carpets are always a victim of accidents. Fortunately, there is a great carpet cleaning solution for just about any mess. And you don’t have to purchase solvents or sprays at all. Sometimes, you already have the ingredients around your home. Read Here: Best Vacuum Cleaner For Carpet- 5 Editor’s Picks & Buying Guide But, first, you need to determine whether your carpet is made of natural or synthetic fibers. From there, you can choose a combination of cleaning solution for your carpet and the kind of stain you have. Read Here: How often should you vacuum your carpet? Cleaning Solutions for Natural Carpets
Cleaning Solution for Synthetic Carpets
Ways To Remove Stains From Carpets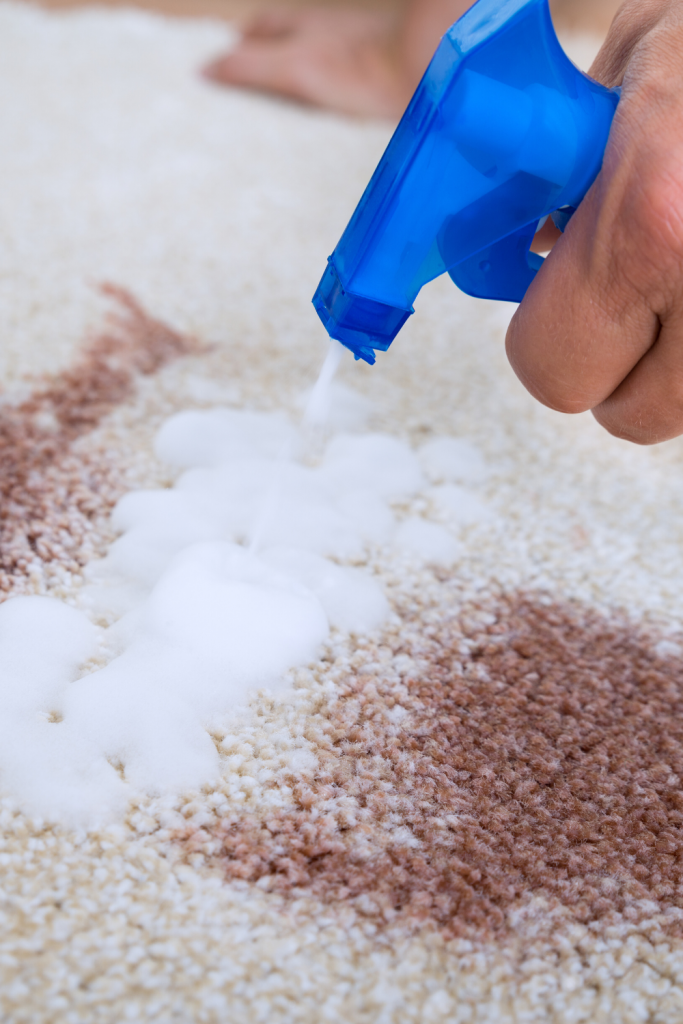
1) Food and Drink StainsNATURAL CARPETS
SYNTHETIC CARPETS
NOTE: For chocolates, candy, juice, berries, soda, milk, and wine stains, before you apply the vinegar solution, you can spray an ammonia solution to the stain then blot with a dry cloth. For Gatorade, ketchup, tomato sauce, and Koo-Aid stains, substitute the ammonia solution for the vinegar solution. 2) Oil and Grease StainNATURAL CARPETS
SYNTHETIC CARPETS
3) Mud and DirtFor both synthetic and natural fiber carpets and rugs, first, you need to remove dry dirt as much as possible using a vacuum cleaner. NATURAL CARPETS
SYNTHETIC CARPETS
Read More:
4) Ink and MarkerNATURAL CARPETSFor ballpoint ink:
For permanent marker:
SYNTHETIC CARPETSFor ballpoint ink:
For permanent marker:
5) Wax and Chewing GumFOR BOTH NATURAL AND SYNTHETIC CARPETS:
6) Pet AccidentsNATURAL CARPETS
SYNTHETIC CARPETS
NOTE: In order to remove the odor from your carpet and prevent your pet from peeing into the carpet again, you can use an enzyme cleaner to destroy the odor-causing bacteria before rinsing the carpet with warm water. The post Best Ways To Remove Stains From Carpets appeared first on Vacuum Cleaners. via Vacuum Cleaners http://relentlesshome.com/best-ways-to-remove-stains-from-carpets/?utm_source=rss&utm_medium=rss&utm_campaign=best-ways-to-remove-stains-from-carpets 
The flooring of all kinds collects dirt and dust which can reduce their beauty. More importantly, going longer than a week without cleaning up those dust and dirt can lead to health issues, aggravating allergies while bacteria tracked in by shoes and spilled foods and drinks can cause serious illnesses and infections such as dysentery and pneumonia. Read Here: 10 Vacuum Cleaning Tips for Your Floors Thus, vacuuming should be your first line of defense. However, while some folks like to vacuum, some dread taking the cleaner out of storage. If you’re like most folks, you might be wondering: How often should you vacuum? Vacuum Carpets and Rugs FrequentlyIn general, it is advised to vacuum your rugs and carpets frequently. This is because carpet fibers trap dirt and dust as well as absorbing spills and grime, making it a nice habitat for bacteria. And the longer you neglect a soiled carpet and continue using and walking on it, the dirtier it becomes. But, what does frequently mean? Well, this depends on the kind of carpet or rug you have and the traffic that it gets. According to experts, you need to vacuum carpets in high traffic areas daily and the entire area at least two times a week. Meanwhile, for carpeted rooms with light traffic, vacuuming carpets can be done at least twice a week. Now, for carpeted rooms that are seldom used, a bi-weekly vacuuming routine should be enough. However, you do not just give it a quick pass. Make sure to run several passes in various directions over an area that brings up the dirt from the bottom, lifting the pile and prevent matting. Read Here: Best Runner Rugs – [Buying Guide] Vacuum Hard Floors and Tiles WeeklyUnless you are tracking in a lot of sand and dirt, have pets or live in a dusty area, you will only need to vacuum your hard floors and tiled floors once a week. Tile and hard floors do not hold on to dirt, dust, and debris as much as a carpeted floor does. This is thanks to their flat and hard construction along with the glaze applied to tile and sealant on hardwood floors in order to prevent quick bacteria and grime buildup. Take note, however, that dander, dust and other allergens can work their way into cracks between floorboards so you do not want to skip the vacuuming for later unless it is a room you rarely use. Vacuum Daily If You Have PetsFor households with pets, then you need to vacuum every day! Pets tend to shed and some drop fleas, which can cause or worsen disease and allergies. Not to mention what they can bring in on their cute paws. So, regardless of what kind of floor you have, if you have cats, dogs or any other furry family member running loose in your home, then you should vacuum daily. Now, if you do not have the time to vacuum daily, then focus more on the furniture and rooms where your pets like to spend most of their time. Read More:
Vacuuming 101: How To Vacuum Properly1) The Right Vacuum For The JobFirst, you need to make sure that you are using the right vacuum for your flooring type. Generally speaking, canister vacuums are suitable for hard floors and tiles since they siphon dust and dirt without scattering it around. Meanwhile, upright vacuums are suitable for soiled carpets since they are usually equipped with beater bars that help lift debris trapped inside rugs and carpet. Now, if your vacuum has various modes for different types of floor, make sure to switch to the mode that is specifically designed for the floor you’re cleaning before vacuuming in order to avoid damages. If your vacuum has a beater bar, make sure to disable it before vacuuming tile floors or hardwood since the brush bristles can scratch such surfaces. If you have a vacuum with an adjustable-height head, then make sure to set the height according to the manufacturer’s instruction for your flooring type, ensuring that the suction is appropriate for your flooring. In addition, consider investing in a HEPA vacuum since it helps catch more bacteria, allergens, and dust than the traditional vacuum filters. 2) Dusting FirstBefore you vacuum, it is always a smart move to dust everything first— blinds, ceiling fans, baseboards, and any higher objects. It should stir up any dirt and dust that settled on higher surfaces and end up on the ground where you can vacuum it more efficiently. 3) Remove Furniture and Small ObjectsToy parts, screws, and other small objects can cause damage to your vacuum. Thus, you will need to handpick such objects before vacuuming the floors. In addition, if you want to, you can also move the furniture out of the room in order to properly vacuum those hard to reach areas. Or you can use the accessories that come with the vacuum to clear these spots. 4) Slow and RepetitiveWhen it is time to vacuum, make sure to do it slowly. In order to pull out dust and dirt on the floor, you need to pass the vacuum several times in the same area. Move it in one direction, pulling it back a couple of times. After doing end-to-end, repeat the process in the opposite direction in order to help pull up dirt and dust more effectively. Do this, especially in high-traffic areas where dirt, dust, and debris accumulate faster. 5) Clean The VacuumAlways remember to replace or empty bags on a regular basis. If you’re using a bagless vacuum, then make sure to empty the canister and cleaning off the filter after every use. Neglecting to do so will reduce air pressure in the vacuum making it less efficient and useful. ConclusionBy following a strict vacuuming schedule as well as the above tips your house will always be clean and sparkly. Not only that, it should help ensure that you and your family won’t suffer any health issues caused by the accumulation of dirt and dust in your home. The post How Often Should You Vacuum? appeared first on Vacuum Cleaners. via Vacuum Cleaners http://relentlesshome.com/how-often-should-you-vacuum/?utm_source=rss&utm_medium=rss&utm_campaign=how-often-should-you-vacuum |

ABOUT USGet the best home decor ideas and product review, perfect home accents to celebrate your individuality from farmhouses bathrooms, dining rooms, DIY projects gardens storage ideas and more. |
 RSS Feed
